Warning:
The ODCC add-on is being discontinued as of January 1st, 2021
Following
Atlassian's announcement to put an end to the Atlassian Server product line, we are very sorry to inform our customers that both the IWAAC Kerberos SSO add-on and the ODCC add-on are being discontinued as of January 1st, 2021. There will be no updates to our products from now on but we will answer to support requests until the end of year 2021.
If you use the IWAAC Kerberos SSO add-on and plan to replace your Atlassian Server applications with Atlassian Data Center applications, we recommend that you configure
SSO for Atlassian Data Center applications which is natively provided by Atlassian on its Data Center product line. In that scenario, your users will be redirected to your Identity Provider (e.g. Microsoft Azure AD, Microsoft ADFS, PingIdentity) for Windows Integrated / Kerberos authentication.
If you use the ODDC add-on and plan to replace your Crowd Server with Crowd Data Center, we recommend that you use
Crowd's native Azure Active Directory Connector for user and group management. You may also want to configure Atlassian's native
SSO for Atlassian Data Center applications on each of your Data Center applications for user authentication. In that scenario, your users will be redirected to Azure AD for password or Multi-Factor authentication.
Feel free to contact us at
support@cleito.com if you have any questions about those recommendations.
Overview
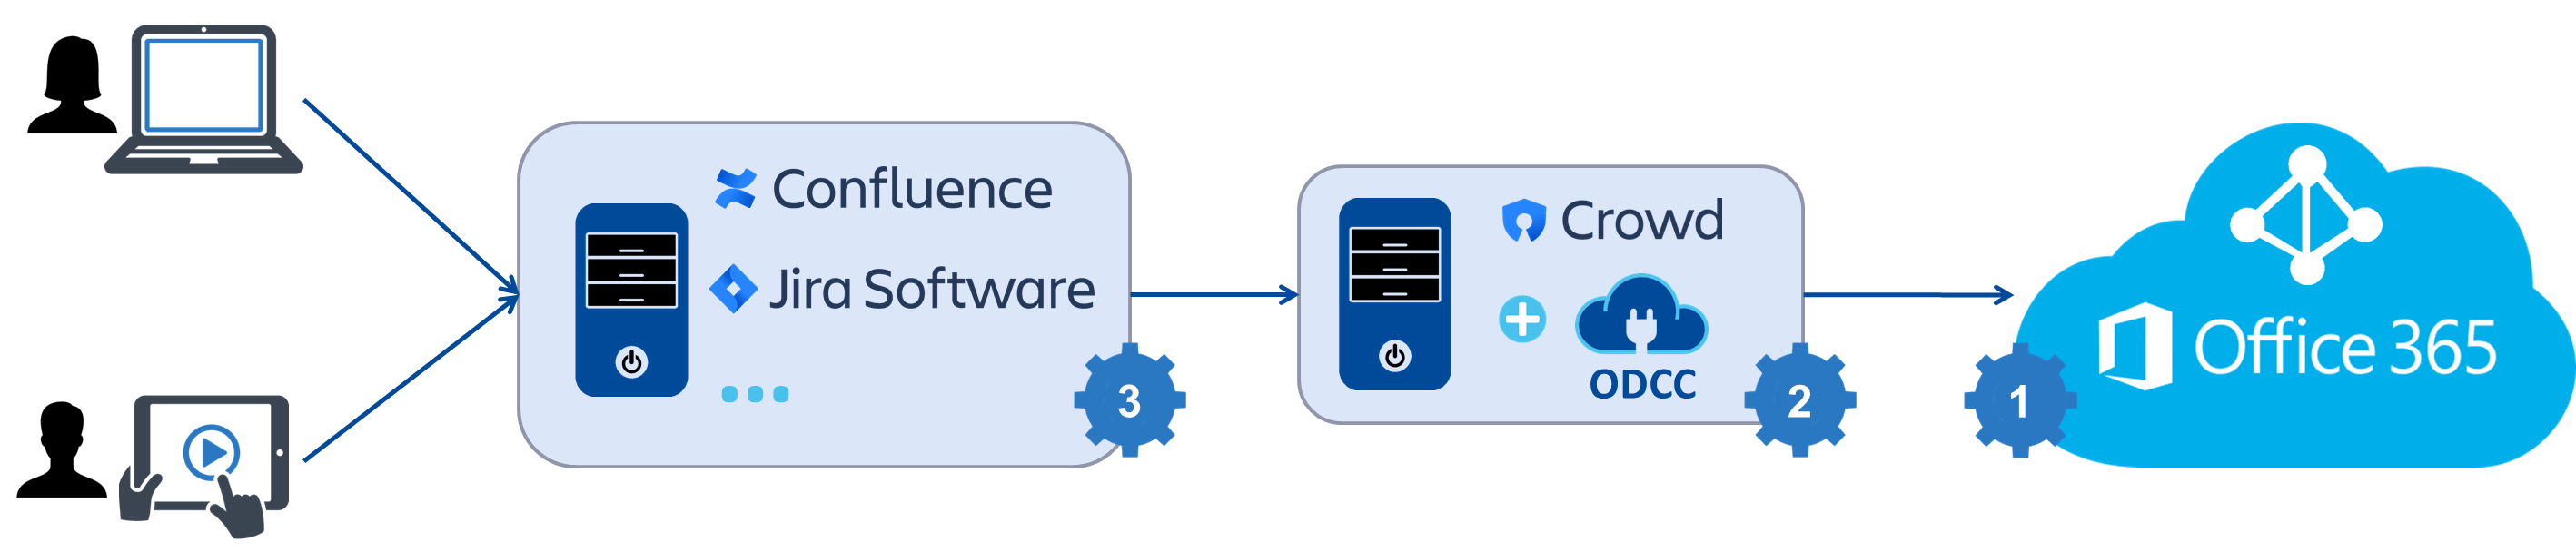
Cleito ODCC is a plugin that you install on the Crowd server to which your Atlassian applications (e.g. Jira, Confluence, Bamboo, Bitbucket) are connected.
The configuration consists in three easy steps:
- First of all, you will need to create an API key in Office 365 / Azure AD. That key will be used by the ODCC plugin to browse your Office 365 / Azure AD tenant and get its users and groups.
- Then you will configure the ODCC plugin in Crowd's administration console. In this step, you will obviously enter the API key you previously created in Office 365 / Azure AD. You will also have the opportunity to set other options such as user and group filtering.
- Finally you will need to configure your applications so that they use Crowd as a User Directory.
Please note that for security reasons the connection to Office 365 / Azure AD is read-only. The ODCC plugin cannot create, update nor delete any object in Office 365 / Azure AD.
Prerequisites
Office 365 uses the cloud-based user authentication service Azure Active Directory to manage users and groups. This implies the following prerequisites for the use of the ODCC plugin:
- Please make sure that your organization has access to its Azure AD administration center. Ask your Office 365 administrator to log into the Office 365 administration portal and to select Admin centers > Azure AD. If the Azure AD admin center is not accessible, then your organization needs to register its free Azure Active Directory subscription. Please see Microsoft's documentation for more details.
- If your organization manages users on-premises, please make sure that password hash synchronization has been enabled. For more information about implementing password hash synchronization with Azure AD Connect, please see Microsoft's documentation. You will also need to set a Home Realm Discovery (HRD) policy to enable direct authentication for federated users. Please read the authentication issues section of this documentation for more details about implementing an HRD policy to enable direct authentication on Azure AD.
System requirements
Crowd server
- Atlassian Crowd 2.9.x or later (up to v4.2.1)
Firewall and proxy rules
Your Crowd server must be able to connect to any URL of the following web sites, either directly or through a proxy.
Azure Global Datacenters
- https://graph.microsoft.com
- https://graph.windows.net
- https://login.microsoftonline.com
Prior to version 1.9, the ODCC plugin would also require the Crowd server the ability to connect to
outlook.office365.com using HTTPS (on port 443) and IMAPS (on port 993).
Azure Germany Datacenters
- https://graph.microsoft.de
- https://graph.cloudapi.de
- https://login.microsoftonline.de
Prior to version 1.9, the ODCC plugin would also require the Crowd server the ability to connect to
outlook.office.de using HTTPS (on port 443) and IMAPS (on port 993).
Step 1 - Office 365 / Azure AD configuration
- Log into Microsoft Azure portal (or Microsoft Azure Germany portal). You do not have to be an administrator, any Azure account in your organization will work.
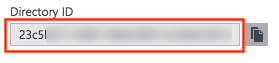
Click on Azure Active Directory > Properties in the left pane and note down the Directory ID as you will need it in the rest of the configuration process.
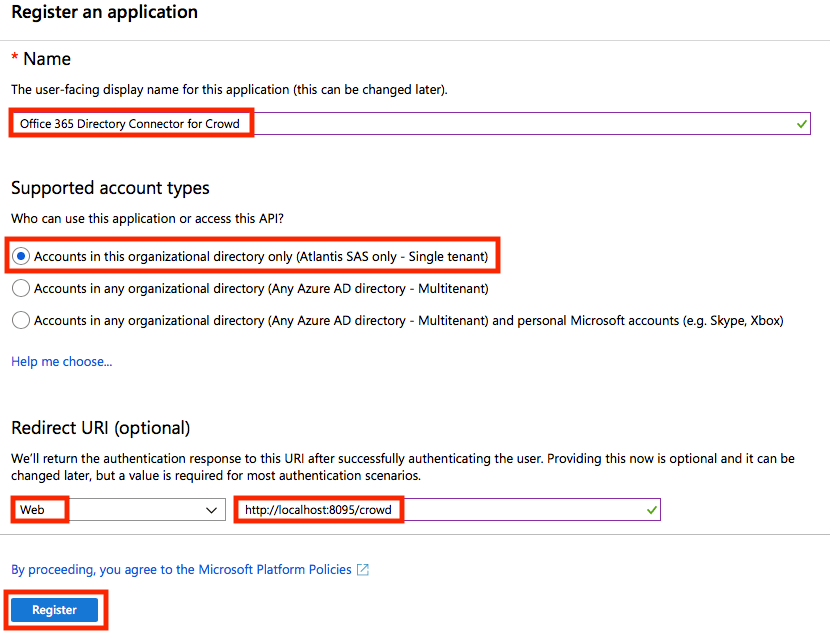
- Now, click on Azure Active Directory > App registrations and then click New registration.

Give the app a name, select Accounts in this organizational directory only as the supported account types, select Web in the Redirect URI section, then enter your Crowd server URL and finally click on Register.
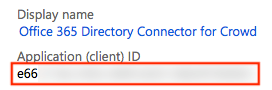
- Note down the Application ID as you will need it in the rest of the configuration process.
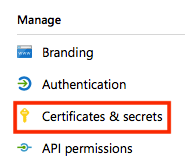
- Click on Certificates & secrets.
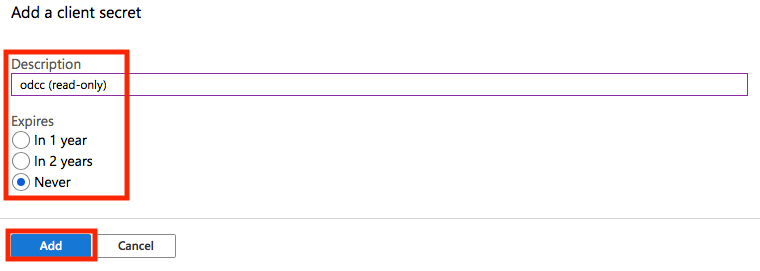
Then click on New client secret.

Then enter a description, select an expiration time and click on Add.
Note down the key value / application secret as you will need it in the rest of the configuration process.

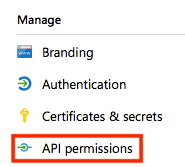
- Click on API permissions.
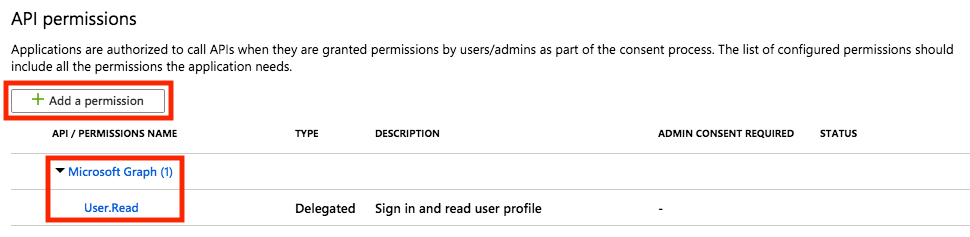
Make sure that Microsoft Graph > User.Read is already selected and click on Add a permission.
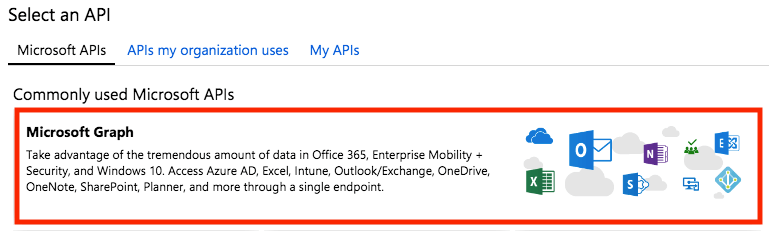
Select Microsoft Graph.
Then select Application permissions

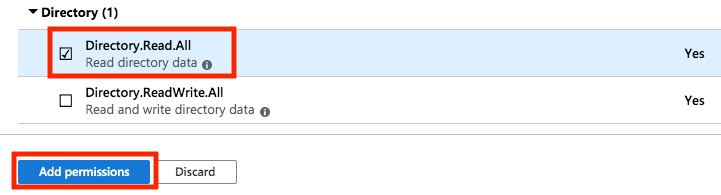
Check Directory > Directory.Read.All and click on Add Permissions.
- (Optional) If you plan to display the Office 365 profile photo as the user avatar in Crowd's console, click again on Add a permission, then select Supported legacy APIs > Azure Active Directory Graph > Application permissions and check Directory > Directory.Read.All. Finally click on Add permissions.
- Those permissions must now be validated by an Azure AD administrator. Ask your Azure AD administrator to open a browser to the following address.
Azure Global Datacenters
https://login.microsoftonline.com/<DIRECTORY_ID>/adminconsent?client_id=<APPLICATION_ID>&state=12345&redirect_uri=<CROWD_URL>
For instance:
https://login.microsoftonline.com/23c5****-****-****-****-************/adminconsent?client_id=e66*****-****-****-****-************&state=12345&redirect_uri=http://localhost:8095/crowd
Azure Germany Datacenters
https://login.microsoftonline.de/<DIRECTORY_ID>/adminconsent?client_id=<APPLICATION_ID>&state=12345&redirect_uri=<CROWD_URL>
For instance:
https://login.microsoftonline.de/23c5****-****-****-****-************/adminconsent?client_id=e66*****-****-****-****-************&state=12345&redirect_uri=http://localhost:8095/crowd
Once logged in, your Azure AD administrator will see the following message:
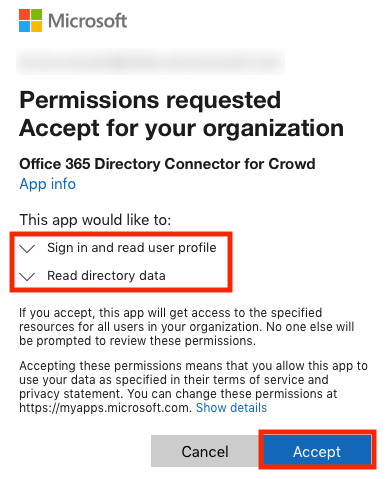
After clicking on Accept, your Azure AD administrator will be automatically redirected to:
<CROWD_URL>?admin_consent=True&tenant=<DIRECTORY_ID>&state=12345
For instance:
http://localhost:8095/crowd?admin_consent=True&tenant=23c5****-****-****-****-************&state=12345
Please note that it does not matter if the <CROWD_URL> is not resolvable nor accessible to your Azure AD administrator. For instance, you might have previously entered http://localhost:8095/crowd as the redirect URI of your app, in which case your Azure AD administrator will get a 404 - Not Found error when redirected to that URL.
Step 2 - Crowd configuration
- Download and unzip the CLEITO ODCC archive somewhere on your Crowd server.
- Copy the content of the lib directory to the crowd-webapp/WEB-INF/lib directory of your Crowd server.
- If you are running Atlassian Crowd v2.10.2, v2.10.3, v2.11.x or v2.12.x, please also copy the content of the extra-libs directory to the crowd-webapp/WEB-INF/lib directory of your Crowd server.
- Edit crowd-webapp/WEB-INF/classes/log4j.properties and add the following line at the end of the file:
### CLEITO ODCC ###
log4j.logger.com.cleito=ALL
ODCC versions prior to 1.9 also required you to add the following lines:
log4j.logger.javax.mail=WARN
log4j.logger.com.sun.mail.imap=WARN
- Restart Crowd.
- Log into Crowd administration console, click on Directories and then on Add directory
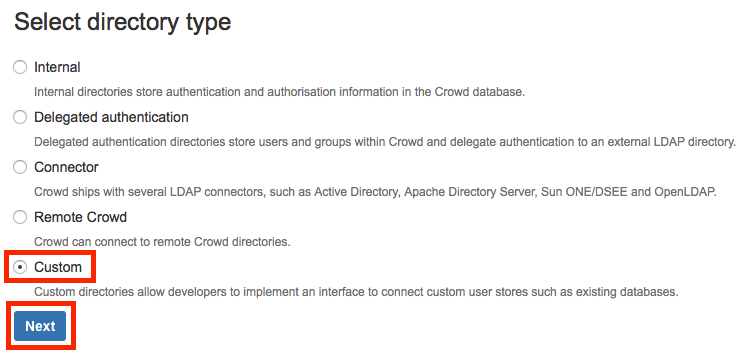
Select Custom for the directory type and click on Next.
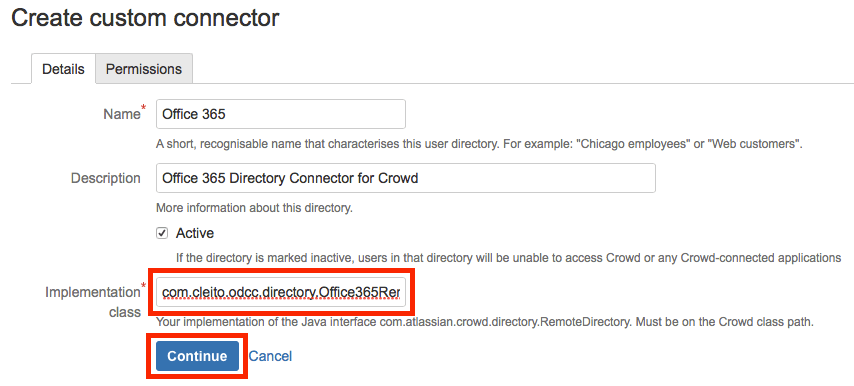
- Give the connector a name and a description, and enter com.cleito.odcc.directory.Office365RemoteDirectory in the Implementation class field. Then click on Continue.
- Click on the Attributes tab and add each of the following attribute-value pairs:
| Attribute |
Value |
Description |
| ms.tenant_id |
<DIRECTORY_ID> |
The ID of your Office 365 / Azure AD tenant |
| ms.client_id |
<APPLICATION_ID> |
The ID of the application that you created in Step 1 |
| ms.client_secret |
<SECRET_KEY> |
The value of the secret key that you created in Step 1 |
Finally click on Update.

If your Office 365 / Azure AD tenant resides in Azure Germany, please also set the following attribute-value pairs:
| Attribute |
Value |
| ms.graph_endoint_url |
https://graph.microsoft.de |
| ms.graph_resource_url |
https://graph.microsoft.de |
| ms.azure_ad_graph_endoint_url |
https://graph.cloudapi.de |
| ms.azure_ad_graph_resource_url |
https://graph.cloudapi.de |
| ms.azure_ad_graph_scope_url |
https://graph.cloudapi.de/.default |
| ms.token_endpoint_server |
https://login.microsoftonline.de |
Prior to version 1.9, the ODCC plugin would also require the following attribute-value pairs:
| Attribute |
Value |
| ms.exchange_endoint_url |
https://outlook.office.de/EWS/Exchange.asmx |
| ms.exchange_wsdl_url |
https://outlook.office.de/ews/Services.wsdl |
| ms.exchange_imaps_server |
outlook.office.de |
- Now click on Users or Groups. You should see all the identities of your Office 365 / Azure AD tenant.
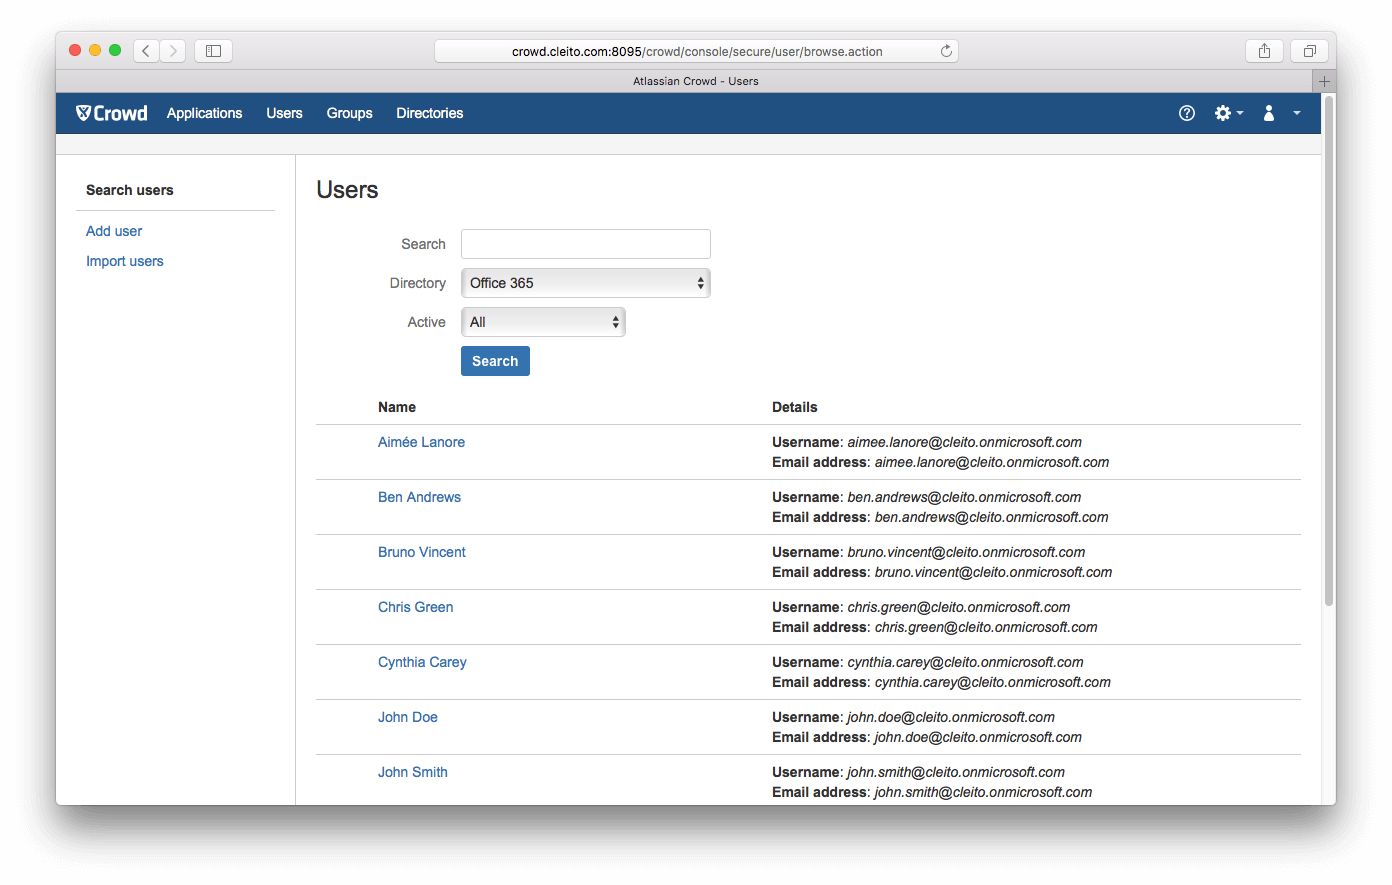 If you don't, go back to the Attributes tab of your Office 365 Directory Connector and click on Update after adding the odcc.log.level attribute and setting its value to FINE. Then click again on Users and take a look at the catalina.out file in the apache-tomcat/logs directory of your Crowd server.
- You might have noticed in the previous example that the default Crowd usernames are in the form shortusername@yourdomain.com. The ODCC plugin actually uses the Azure AD userPrincipalName attribute as the username attribute for Crowd users.
If you want Crowd to use the shortusername part, you will need to set the value of the odcc.remove.domain.in.username attribute to true and the value of the ms.client_domain attribute to the domain name part of your users UPN (e.g. yourdomain.com or yourdomain.onmicrosoft.com).
The following table lists all the available configuration options of the ODCC plugin:
| Attribute |
Description |
Default Value |
Available since version |
| odcc.remove.domain.in.username |
Either true or false
When set to true, the username in Crowd will be the short username part of the userPrincipalName in Azure AD. Please note that the ms.client_domain attribute must also be set. |
false |
1.0 |
| ms.client_domain |
The domain name part of your users UPN in Office 365 / Azure AD, e.g. yourdomain.com or yourdomain.onmicrosoft.com |
|
1.0 |
| odcc.get.other.user.properties |
Either true or false
When set to true, the ODCC plugin will retrieve common Azure AD user profile attributes (e.g. jobTitle, department, businessPhones) as Crowd custom attributes. See the section titled About synchronized attributes for a complete list of attributes fetched from Azure AD. |
false |
1.4 |
| odcc.fallback.mail.to.mailnickname |
Either true or false
When set to true, the ODCC plugin will fill in the Crowd email address with the value of the Azure AD mailNickname attribute if the mail attribute has not been provisioned. Please note that the ms.client_domain attribute must also be set. See the section titled About empty email addresses for more details. |
false |
1.4 |
| odcc.get.user.avatar |
Either true or false
When set to true, the ODCC plugin will use the Office 365 profile photo as the Crowd user avatar. Please note that this can have a huge impact on performance especially when listing users in Crowd administration console.
Please note that starting from Crowd 3.1.0, you will also need to add the following option to JAVA_OPTS in apache-tomcat/bin/setenv.sh (Linux, Mac OS) or apache-tomcat/bin/setenv.bat (Windows):
-Datlassian.darkfeature.browseprincipals.usedirectoryavatars=true
|
false |
1.0 |
| odcc.fetch.users.from.groups |
A list of comma separated groups, e.g. Paris_Users, London_Users
If this property is set, the ODCC plugin will only fetch users who are direct members of those groups. If this property is not set, all Azure AD users will be returned.
Starting from ODCC v1.5, a wildcard character ('*') can be used at the end of the group names so as to implement startswith filtering, for instance Paris*, London_Users, M* will return Paris_Users, London_Users, Madrid_Users and Melbourne_Users.
You can disable startswith filtering by setting odcc.fetch.users.from.groups.wildcard.is.enabled to false. |
|
1.1 |
| odcc.limit.groups |
A list of comma separated groups, e.g. jira-software-users, confluence-users
If this property is set, the ODCC plugin will only fetch groups whose names match the specified terms. If this property is not set, all Azure AD groups will be returned.
Starting from ODCC v1.5, a wildcard character ('*') can be used at the end of the group names so as to implement startswith filtering, for instance jira*, confluence-users, bamboo-u* will return jira-administrators, jira-users, confluence-users and bamboo-users.
You can disable startswith filtering by setting odcc.limit.groups.wildcard.is.enabled to false. |
|
1.0 |
| odcc.users.search.restriction.local |
Either true or false
When set to false, search restrictions on users will be included as query parameters in the HTTPS request to Azure AD. Otherwise search restrictions will be applied locally. |
true |
1.1 |
| odcc.groups.search.restriction.local |
Either true or false
When set to false, search restrictions on groups will be included as query parameters in the HTTPS request to Azure AD. Otherwise search restrictions will be applied locally. |
false |
1.1 |
| odcc.groups.exclude.unified |
Either true or false
When set to true, groups whose groupTypes attribute's values contain Unified will be excluded. Such groups are also just called Office 365 groups. |
false |
1.7 |
| odcc.groups.exclude.security.disabled |
Either true or false
When set to true, groups whose securityEnabled attribute's value is false will be excluded. |
false |
1.7 |
| odcc.groups.exclude.mail.enabled |
Either true or false
When set to true, groups whose mailEnabled attribute's value is true will be excluded. |
false |
1.7 |
| ms.token_endpoint_version |
When set to 2.0, the ODCC plugin will use tokens issued by the Azure AD v2.0 endoint to browse your Office 365 / Azure AD tenant (only available in Azure Global Datacenters). |
|
1.8 |
| http.max.connections |
The maximum number of HTTP connections in the connection pool when requesting Office 365 / Azure AD |
20 |
1.0 |
| http.timeout |
The HTTP connection timeout (in milliseconds) when requesting Office 365 / Azure AD |
20000 |
1.0 |
| http.proxy.host |
The server name of the proxy server used to request Office 365 / Azure AD, e.g. internal-proxy.cleito.com |
|
1.0 |
| http.proxy.port |
The port of the proxy server used to request Office 365 / Azure AD, e.g. 3128 |
|
1.0 |
| http.proxy.username |
The username used to authenticate with the proxy server. This can only be used with TLS/SSL termination proxies. |
|
1.0 |
| http.proxy.password |
The password used to authenticate with the proxy server. This can only be used with TLS/SSL termination proxies. |
|
1.0 |
| odcc.log.level |
Either INFO or FINE
The log level used by the ODCC plugin |
INFO |
1.0 |
| odcc.license |
The commercial license key to be entered after purchasing the product |
|
1.0 |
The following table lists the configuration options that have been removed in recent versions of the ODCC plugin:
| Attribute |
Description |
Default Value |
Initially released in version |
Removed in version |
| odcc.authentication.protocol |
Either https or imaps
When set to imaps, the ODCC plugin would use the IMAPS protocol to authenticate end-users on Office 365. This required that ALL users had a valid Office 365 Exchange Online mailbox.
This option was removed in ODCC v1.9 as Microsoft announced it would decommission Basic Authentication for IMAPS on October 13th, 2020. |
https |
1.0 |
1.9 |
| odcc.authentication.api |
When set to ews, the ODCC plugin would use the Exchange Web Services (EWS) API for the authentication of ALL users, not just users with Azure AD Multi-Factor Authentication (MFA) enabled. This required that ALL users had a valid Office 365 Exchange Online mailbox.
This option was removed in ODCC v1.9 as Microsoft announced it would decommission Basic Authentication for Exchange Web Services on October 13th, 2020. |
|
1.3 |
1.9 |
| imaps.timeout |
The IMAPS connection timeout (in milliseconds) when requesting Office 365
This option was removed in ODCC v1.9 as Microsoft announced it would decommission Basic Authentication for IMAPS on October 13th, 2020. |
10000 |
1.0 |
1.9 |
- Now click on the Applications tab of Crowd administration console and add the Office 365 Directory to the list of directories of each of the applications that you want to integrate with Cleito ODCC.
If your application is not listed, please, see Atlassian's documentation for details on adding an application to Crowd.

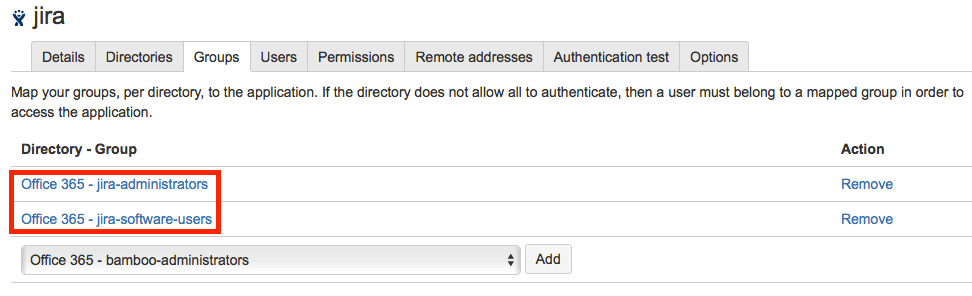
You must also add the groups whose members are allowed to authenticate in the Groups tab of each of your applications.
Step 3 - Application configuration
You must now add the Crowd server to the list of user directories that your application (e.g. Jira) will rely upon.
-
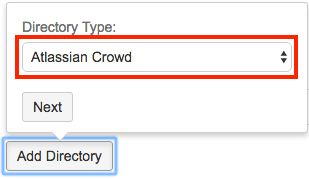
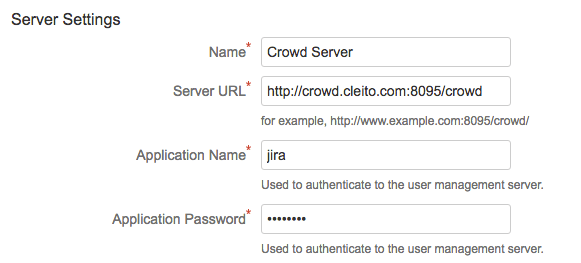
Log into your application as an administrator, select User management in the Administration pane and click on User Directories. Then click on Add Directory, select Atlassian Crowd and click on Next.
- Fill in the required fields in Server Settings
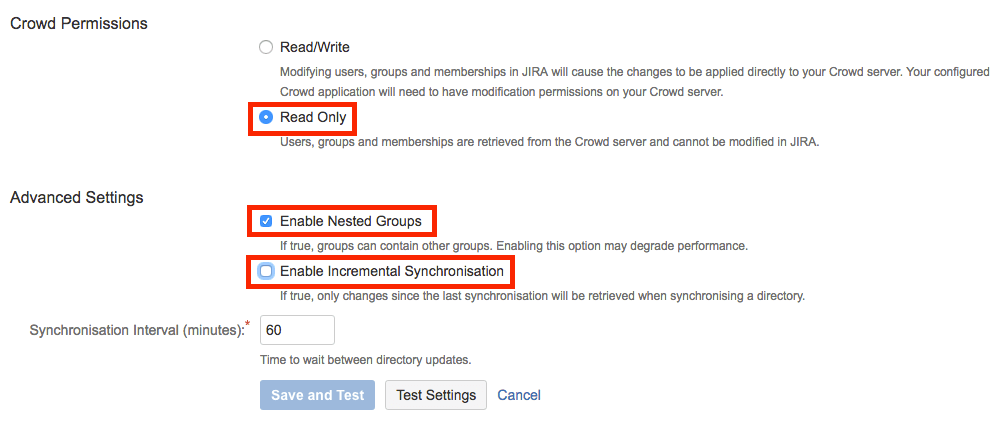
- Select Read Only in Crowd Permissions. Then select Enable Nested Groups and uncheck Enable Incremental Synchronisation. Finally click on Test Settings and then on Save and Test.
- Click on Synchronise.

Once the synchronisation is over, you should see all your Office 365 / Azure AD users and groups in the User Management pane.
- Finally you should disable the built-in User Management in your application as detailed in Atlassian's documentation. If you don't, users will still see the Forgot Password link on your application's login form and will also see the link to reset their password in their profile pane. They should not see these links anymore as their account is now managed in Office 365 / Azure AD.
About synchronized attributes
By default the ODCC plugin will only retrieve the following Azure AD attributes and map them to the corresponding fields in Crowd.
|
Azure AD |
Crowd |
| Groups |
displayName |
name |
| description |
description |
|
|
|
|
Azure AD |
Crowd |
| Users |
userPrincipalName |
username |
| mail |
email |
| givenName |
firstName |
| surname |
lastName |
| displayName |
displayName |
| accountEnabled |
active |
| id |
externalId |
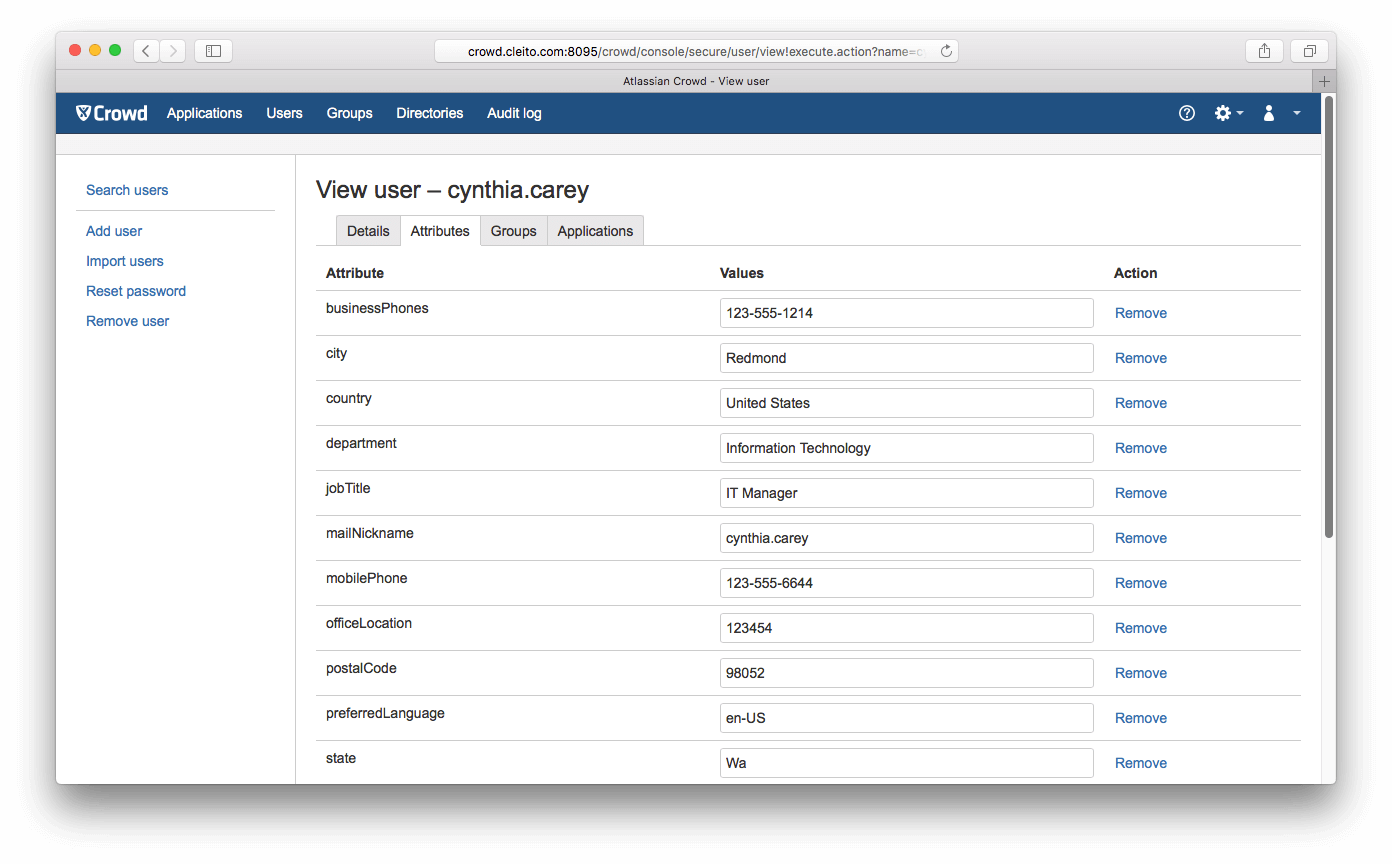
Since ODCC v1.4, if you set the value of the
odcc.get.other.user.properties attribute to
true, the following Azure AD attributes will also be retrieved as Crowd custom attributes:
businessPhones,
city,
country,
department,
jobTitle,
mailNickname,
mobilePhone,
officeLocation,
postalCode,
preferredLanguage,
state,
streetAddress,
usageLocation,
userType.
About empty email addresses
Some of your users might have a blank email address in Crowd. The reason is that the ODCC plugin fills in the Crowd email address field with the value of the Azure AD
mail attribute. The point is that
the mail attribute is only provisioned in Azure AD for users with an Exchange Online mailbox.

Since ODCC v1.4, if you set the value of the
odcc.fallback.mail.to.mailnickname attribute to
true, the Crowd email address field of users with no Exchange Online mailbox will be filled in with the value of the Azure AD
mailNickname attribute (which is always provisioned) concatenated to the
@ character plus the value of the
ms.client_domain attribute.

About users with Multi-Factor Authentication (MFA) enabled
Some of your users might have enabled Azure AD Multi-Factor Authentication (MFA) on their Office 365 / Azure AD account. By default, such users will not be able to authenticate to your Atlassian applications. There are
distinct options to cope with that situation.
Option 1 - Install a federated authentication add-on on each of your applications
In this scenario, users will not authenticate to your Atlassian applications by entering a username and password in the login forms of those applications. Instead users will be redirected to Microsoft's Azure login page where all authentication steps (including MFA) will occur. Then they will be redirected back to your applications.
From a
security perspective, this is the
best option as access to your Atlassian applications is secured by the same authentication modes as your Office 365 applications (e.g. Outlook on the web, SharePoint Online).
There are many federated authentication add-ons available on Atlassian Marketplace using either the
SAML,
OAuth or
OpenID Connect protocols. Some of those add-ons are free, others are commercial. Among the free ones, Microsoft provides one for
Jira and one for
Confluence.
Option 2 - Skip MFA for applications that integrate with Crowd
In this scenario, users with Azure AD MFA enabled will authenticate to your Atlassian applications by entering only their Office 365 username and password in the login forms of those applications. Users will not be asked to enter any other authentication factor response. This is made possible by adding your
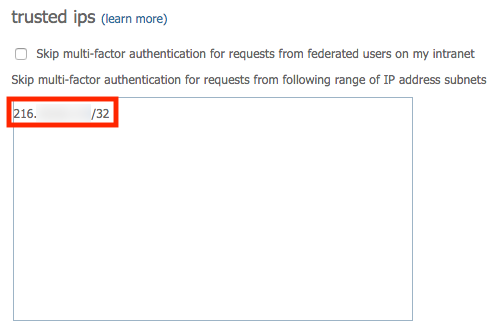
Crowd server's public IP address to the list of
trusted ips in Azure AD MFA settings.
Please note that
trusted ips are available for
organizations that subscribed to an Azure AD Premium edition (P1 or P2) only.
- Make sure that you understand the security implications of this option.
In this scenario, an attacker who has taken control of the Crowd server would be able to impersonate any user and access to any Office 365 / Azure AD protected resource or application (e.g. Outlook on the web, SharePoint Online) even if the impersonated users enabled MFA on their Office 365 / Azure AD accounts.
- Determine your Crowd server's public IP address.
The IP address you want to add to the list of trusted ips in Azure AD MFA settings is the public IP address of your Crowd server acting as an HTTPS client to Azure AD. You can send a simple cURL request from your Crowd server to an external service like ipinfo.io to determine that public IP address.
For instance:
curl 'https://ipinfo.io/ip'
- Log into Microsoft Azure portal as an Azure AD administrator.
Click on Azure Active Directory > Security > MFA > Getting started.
Then click on Configure additional cloud-based MFA settings.
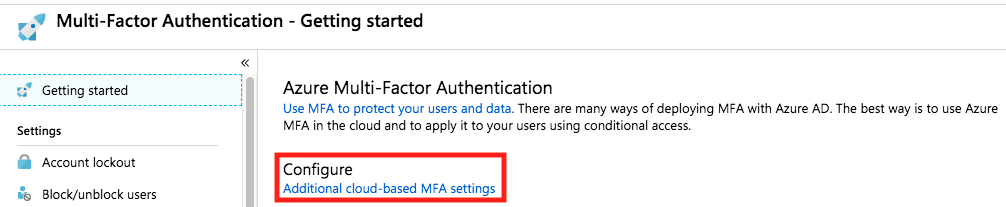
Finally add your Crowd server's public IP address in CIDR notation to the list of trusted ips and click on Save.
Warning:
Make sure that your Crowd server's public IP address is not shared with your end users' browsers.
For example, this may be the case if your end users and the Crowd server connect to the internet through the same proxy server. In such a situation, MFA would be disabled on all Azure AD protected resources and applications (e.g. Outlook on the web, SharePoint Online), not just Atlassian's applications that integrate with Crowd.
Option 3 - App passwords
Warning:
This option has been removed in ODCC v1.9.
Prior to version 1.9, the ODCC plugin allowed the usage of
app passwords. Users with Azure AD MFA enabled would enter an app password in the login forms of Atlassian applications to authenticate (instead of the usual Office 365 / Azure AD user password). This option relied upon Exchange Web Services for Office 365 and required that users with Azure AD MFA enabled had a valid Office 365 Exchange Online mailbox to login.
This option was removed in ODCC v1.9 as Microsoft announced it would decommission Basic Authentication for Exchange Web Services on October 13th, 2020.
About SSO
If you have enabled Crowd SSO, your users will log into a first application with their Office 365 account and then they will be able to browse from one application to another without reauthenticating.
However, if you configured the Cleito ODCC plugin with the
odcc.remove.domain.in.username option, your users will have to use their short username (e.g.
firstname.lastname) when logging in first. As a matter of fact, if the
odcc.remove.domain.in.username option is enabled and your users authenticate with their full
userPrincipalName (e.g.
firstname.lastname@yourdomain.com), then Single Sign-On won't work and your users will have to authenticate again.
About guest users
Warning:
Personal accounts (e.g. john.doe@gmail.com) that are invited to your Azure AD tenant will not be able to authenticate through the ODCC plugin due to a known limit in Azure AD API. Only business accounts (e.g. john.doe@anothercompany.com) are supported.In Microsoft Azure portal, personal guest user accounts are labeled as
Microsoft Accounts
In Microsoft Azure portal, business guest user accounts are labeled as
External Azure Active Directory Accounts
Azure AD guest users have usernames in the form of
firstname.lastname_example.com#EXT#@yourcompany.com (or
firstname.lastname_example.com#EXT#@yourcompany.onmicrosoft.com). While guest users can login the same way regular
member users do, having such a long and complex username is definitely not user friendly when it comes to fill in an authentication form.
Since its version 1.4, the ODCC plugin relies on
Crowd User Aliasing to provide a nice way to resolve that issue. In short, all you need to do as a Crowd administrator, is to
set a guest user's email address as a username alias for each of the applications this guest user will log into.
For instance let's suppose you want Azure AD guest user
John Doe to be able to login into Jira and Confluence with his email address (e.g.
john.doe@example.com) instead of his Azure AD's
userPrincipalName (e.g.
john.doe_example.com#EXT#@yourcompany.com).
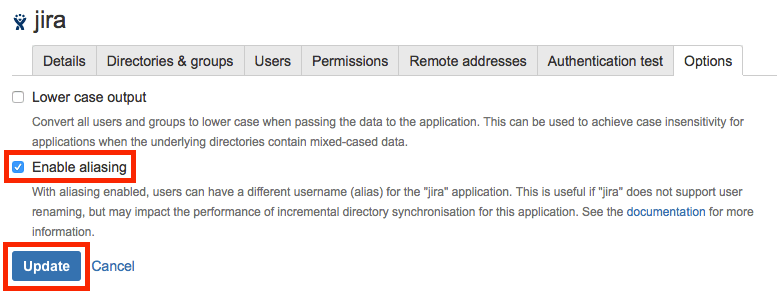
First of all, as a Crowd administrator, go to
Applications > Jira > Options, then check
Enable aliasing and click on
Update. Then do the same for the
Confluence application.
Then, still as a Crowd administrator, go to the
Users tab and search & select the guest user for whom you want to add aliases. Then, in the
Applications tab of the guest user's profile, fill in the alias fields with the guest user's email address and click on
Update.
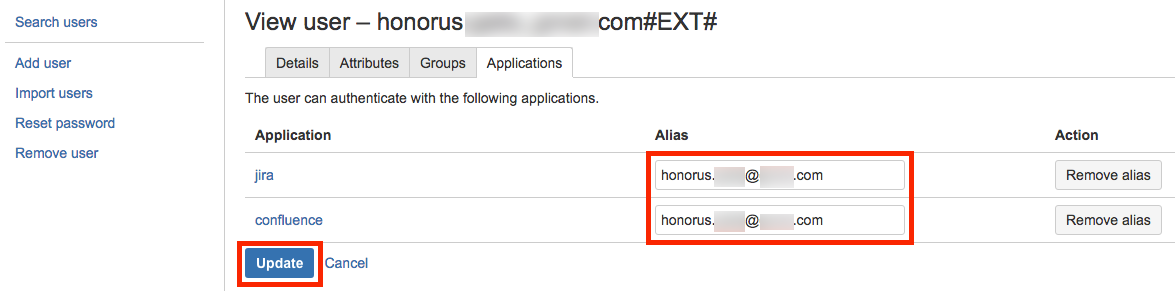
From now on, this guest user can
log into Jira and Confluence with his email adress.
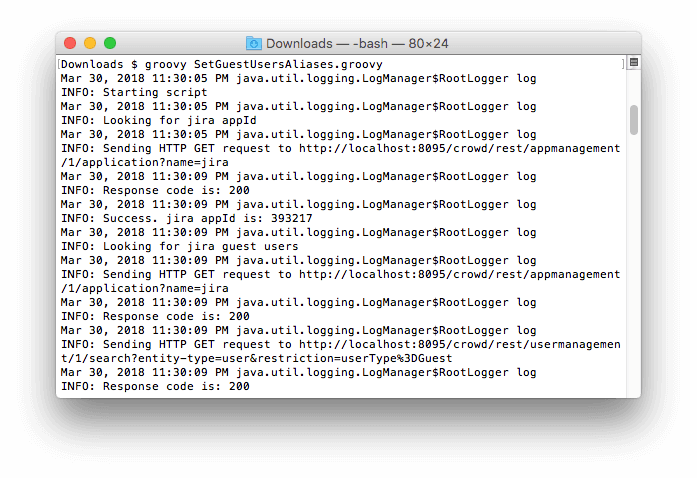
Since manually adding aliases for each of your guest users can be a painstaking process, we provide a Groovy script that searches for all your Azure AD guest users and adds their email addresses as aliases for the applications they have access to.
Warning:
As the Groovy script we provide adds entries to Crowd's database, we strongly recommend to test the following procedure on a staging environment before going live in production.
- First of all, please make sure that you have installed and configured ODCC v1.4 or later on your Crowd server.
- Enable aliasing for your applications as detailed above.
- Then set the value of the odcc.get.other.user.properties attribute to true in the Attributes tab of your Office 365 Directory Connector.
- Download and unzip SetGuestUsersAliases.zip (View MD5)
- Edit the settings in the Configuration section of the script so as to fit with your environment. You will need to enter the username and password of a Crowd administrator and the application names and passwords of your applications as configured in Crowd.
- Make sure that you are running Groovy v2.4.x or later.
groovy -version
- Run the Groovy script and verify in Crowd's console that your guest users have been added their email addresses as username aliases.
groovy SetGuestUsersAliases.groovy
- Finally you might want to configure a scheduler such as cron to run the Groovy script periodically. For instance, on Linux this runs the Groovy script every day at 2AM:
(crontab -l ; echo "0 2 * * * /path/to/groovy /path/to/SetGuestUsersAliases.groovy") | crontab -
About newly created users
Newly created (or recently unlocked) users in Office 365 / Azure AD might have to log into their Office 365 account and change their password before they can log onto your Atlassian applications.
Upgrading
If you need to upgrade CLEITO ODCC, replace
CLEITO-ODCC-1.x.jar with
CLEITO-ODCC-1.10.jar in the
crowd-webapp/WEB-INF/lib directory of your Crowd server. Then restart Crowd.
Entering license key
Go to the
Attributes tab of your Office 365 Directory Connector in Crowd administration console, enter your license key in the value field of the
odcc.license attribute, click on
Add and then on
Update.

Uninstall / Emergency
The ODCC plugin does not store anything locally. All your users and groups are stored in Office 365 / Azure Active Directory and only there. They are not replicated in Crowd's database. Therefore, if you want to stop using the ODCC plugin (for instance because your organization has decided to migrate away from Office 365) you will need to export your users and groups from Azure AD and import them into another Crowd's directory. You might also want to migrate your Office 365 Cloud accounts to Crowd local accounts in an emergency situation where your Crowd server has lost connectivity to Office 365 / Azure AD.
In such cases, please follow the next instructions:
- On your Windows workstation, install the PowerShell Azure AD module as detailed in Microsoft's documentation
Install-Module AzureAD
- Download and unzip ExportOffice365UsersAndGroups.zip (View MD5)
- Edit the ExportOffice365UsersAndGroups.ps1 script and modify the ODCC options so as to match your configuration
- Then run the script in a PowerShell or command line prompt
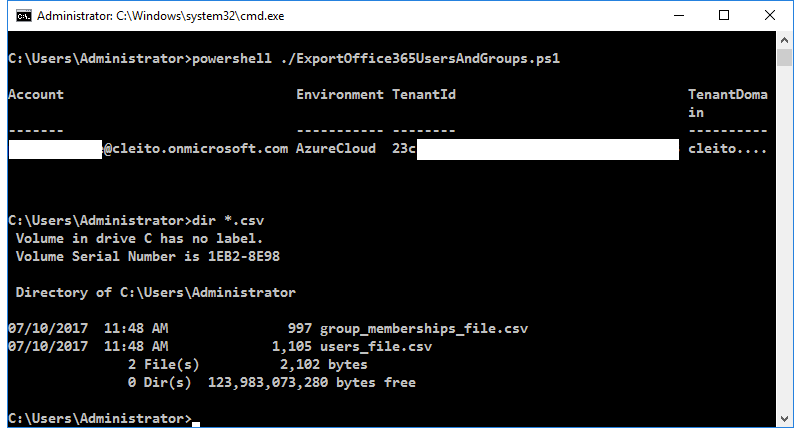
powershell ./ExportOffice365UsersAndGroups.ps1
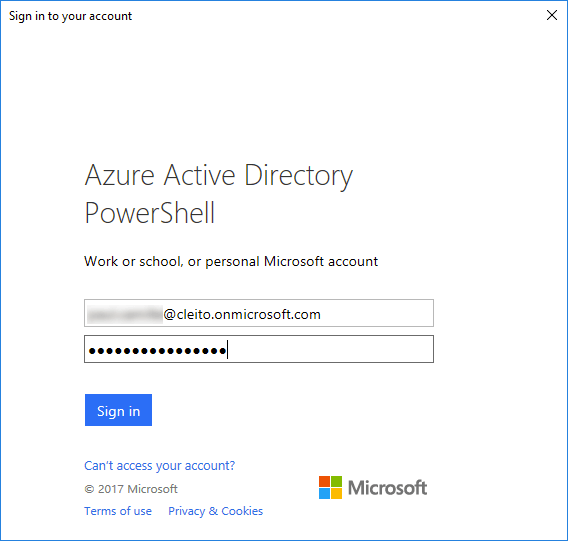
You will be prompted a username and password. You can use any Office 365 / Azure AD account here, this does not have to be an Administrator account.
Once the script has finished running, you will find two CSV files on your local path:
- users_file.csv
- group_memberships_file.csv
Please note that the passwords included in users_file.csv have been randomly generated by the script. These are not the users' passwords in Office 365 since the users' credentials cannot be extracted from Azure AD.
- Now go to Crowd administration console and follow Atlassian's instructions to import the CSV files in any of your Crowd directories (e.g. Internal, LDAP). Please note that Crowd's CSV importer does not support nested groups so you will have to manually add groups as other groups' members when the import is over.
- For each of your applications (e.g. Jira, Confluence), add the directory in which you imported your users and groups to the list of authorized directories (in first position). Please also make sure to add the required groups to the list of authorized groups for your applications.
- Finally, make sure that your users can log onto your applications using the passwords that were randomly generated by the script. Then remove the ODCC directory from the list of authorized directories for your applications.
Troubleshooting and problem resolution
Whatever your problem is, please go to the
Attributes tab of your Office 365 Directory Connector in Crowd administration console, then set the value of the
odcc.log.level attribute to
FINE:

ODCC events will be logged into the
apache-tomcat/logs/catalina.out file of your Crowd server. They are all prefixed by the
[ODCC] string so you can easily parse the generated log file.

When you have solved your problem, you can turn back the log level to
INFO.
Please note that
if you do not get any ODCC event in the logs, that is most probably because you forgot to edit the
log4j.properties file as detailed at the beginning of
Step 2
Authentication issues
If federated users face authentication issues although they do enter valid credentials in Atlassian's applications login forms, you should check that
direct authentication is enabled on your Azure AD tenant. As of May 2018, direct authentication has been disabled by default by Microsoft, thus you probably need to explicitly enable it again for the ODCC plugin. As a matter of fact, the ODCC plugin uses the Resource Owner Password Credential (ROPC) grant which allows an application to sign in the user by directly handling their Azure AD password.
If direct authentication is actually disabled on your Azure AD tenant, you will need to ask your Azure AD administrator to
set a Home Realm Discovery (HRD) policy on the ODCC application object that you created in Azure AD at the beginning of
Step 1.
This can be done with a PowerShell script:
Install-Module AzureADPreview
Connect-AzureAD
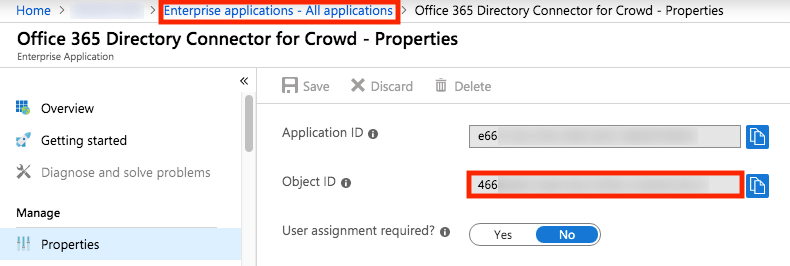
$spId = "466*****-****-****-****-************"
$policy = New-AzureADPolicy -Definition @("{`"HomeRealmDiscoveryPolicy`":{`"AllowCloudPasswordValidation`":true}}") -DisplayName EnableDirectAuth -Type HomeRealmDiscoveryPolicy
Add-AzureADServicePrincipalPolicy -Id $spId -RefObjectId $policy.Id
Get-AzureADPolicyAppliedObject -Id $policy.Id
Please see
Microsoft's documentation for more details on setting an HRD policy on an application object or contact Microsoft's Azure support.
Once you have set a HRD policy to enable direct authentication, you can use a simple
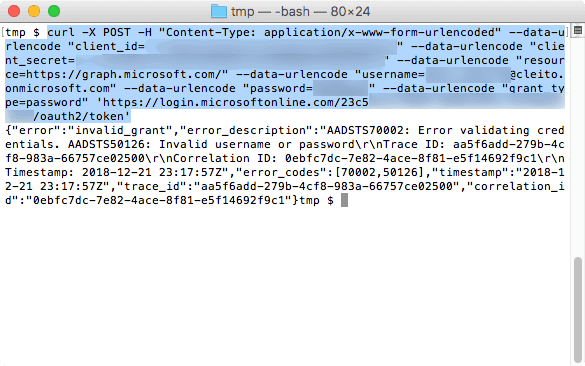
cURL command to test a user's authentication against Azure AD through the ROPC flow (which might be a simpler alternative than checking the ODCC logs):
curl -X POST -H "Content-Type: application/x-www-form-urlencoded" --data-urlencode "client_id=<APPLICATION_ID>" --data-urlencode "client_secret=<SECRET_KEY>" --data-urlencode "resource=https://graph.microsoft.com/" --data-urlencode "username=<USERNAME>" --data-urlencode "password=<USER_PASSWORD>" --data-urlencode "grant_type=password" 'https://login.microsoftonline.com/<DIRECTORY_ID>/oauth2/token'
For instance:
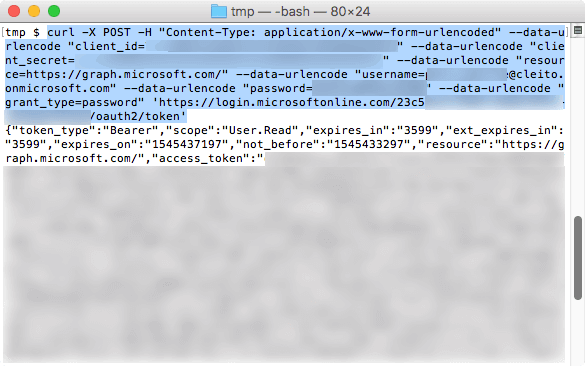
curl -X POST -H "Content-Type: application/x-www-form-urlencoded" --data-urlencode "client_id=e66*****-****-****-****-************" --data-urlencode "client_secret=Apu****************************************" --data-urlencode "resource=https://graph.microsoft.com/" --data-urlencode "username=john.doe@yourcompany.onmicrosoft.com" --data-urlencode "password=********" --data-urlencode "grant_type=password" 'https://login.microsoftonline.com/23c5****-****-****-****-************/oauth2/token'
Here is an example of a successful authentication:
And here is an example of a failed authentication:
Synchronization issues
By default, the Crowd client library that is embedded in each of your Atlassian product will timeout if the synchronization lasts longer than 10 minutes. If there are a large number of users, groups and group memberships in your Office 365 / Azure AD tenant, you will need to increase that timeout by setting the
crowd.property.socket.timeout property in the JVM arguments of your Atlassian product.
For instance, to set the timeout to 40 minutes (i.e. 2400000 milliseconds):
-Dcrowd.property.socket.timeout=2400000
Please see the following documentation pages for more information on how to add a JVM argument in each product's startup script:
In Bitbucket Server 4.x and earlier, add the
-Dcrowd.property.socket.timeout=<timeout value in ms> parameter to the
JVM_SUPPORT_RECOMMENDED_ARGS environment variable in
<Bitbucket Server Installation>/bin/setenv.sh
Starting with Bitbucket Server 5.x, the procedure depends on whether you are running Linux or Windows. Quoting Atlassian's documentation:
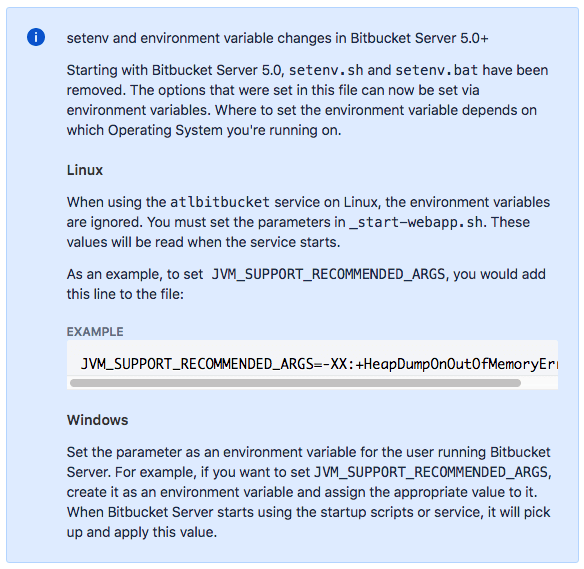
Finally you must also make sure that your Atlassian products connect directly to Crowd and bypass any proxy or reverse proxy server. Alternatively, you will need to change the configuration of the reverse proxy in front of Crowd to increase the request timeout to be high enough to let the synchronization complete.